Showing posts with label knitty gritty. Show all posts

Wednesday, February 13, 2013

Knitting Frenzy

Completed


1. January Cowl - This project taught me that, though I may love the way large cables look, I hate knitting them.
2. Dog Sweater - My very first sweater! After completing this project, I think I'll be much more comfortable about starting a sweater for myself.
3. I-Cord Necklace Cowl - This design was so simple and easy, I may have to use this to use up most of the rest of my stash.
4. Harry Potter Bookmark - I'm slowly making a bookmark for every book in my library, or at least the ones not going into my sell pile.

Working On


1. Depths Cowl - I found a wonderful stitch pattern for an open mesh stitch from Derya Davenport.
2. Temperature Journal - I broke down and bought some cross stitch canvas, so now I'm actually working on stitching the journal!
3. Wonder Woman Fingerless Gloves - I'm so excited to get to wear these things!
4. Bookmark

Starting Soon

1. iPad Sweater - My fair isle February goal will soon be underway.
2. Bookmark
3. Flower Bud - I'm excited to finally have a flower bud for my little bud vase.

Wednesday, January 23, 2013

Knitting Frenzy

Completed

1. A new drink cozy for the shop.
2. Part 1 of the knit-a-long is finished. The big reveal is coming soon!

Working On

1. January cowl
2. Dog sweater
3. Infinity necklace

Starting Soon

1. Temperature journal.
2. Wonder Woman fingerless gloves and golden lasso necklace.
3. A new cowl for the shop.

Wednesday, January 16, 2013

Knitting Frenzy

Completed

1. Camera strap
2. Bookmark
3. Bookmark

Working On

1. Part 1 of mystery knit-a-long
2. Dog sweater
3. Felix the Cat slippers

Starting Soon

1. Temperature journal
2. Drink cozy
3. January cowl

Wednesday, January 9, 2013

Knitting Frenzy: all the blues

Completed Projects

1. Mossy headband

2. Cabled Cowl

3. Foxy Hat

4. Owl Wristees


Working On


1. The Camera strap is turning out so pretty. I can't wait to attach it to my camera!
2. Part 1 of the mystery knit-a-long is officially under way.
3. The collar of the dog sweater is just too adorable so far. And the premium acrylic yarn is so soft and comfy.
4. The Felix the Cat slippers don't look like they've come very far, but they really have. I've frogged and restarted so many times now, but I do believe this will be the final go around.

Starting Soon


1. My year in temperatures journal. The original concept by Kristen Cooper was for a temperatures scarf, but I didn't have enough colors of yarn in my stash for that so I decided on a cross stitch version. Next obstacle? I don't have any cross stitch fabric. So after some brainstorming, I came up with cross stitching the entire year of temperatures into a little moleskin sketch journal.
2. 12 cowls in 2013 is one of the great stash-busting projects I'm taking on this year, and January's cowl will soon be casted on.
3. Another dots drink cozy with this pretty self-striping yarn for the shop.

Wednesday, January 2, 2013

Knitting Frenzy: all play and no work

Completed Projects
1. I just absolutely love the feather and fan pattern used for the soda can cozy.
2. Mom was very pleased with how her curling iron travel cozy turned out.
3. The dots iced drink cozy (pattern coming soon) makes me so happy - dots are adorable.

Gee... it seems I'm very taken with cozies lately.

Working On


1. All that's remaining on the foxy hat is some braids.
2. Those Felix the Cat slippers are still giving me some trouble, but I will prevail!
3. A pair of owl wristees and a matching headband for the shop - and omigosh the yarn is so soft.

Starting Soon


1. A camera strap for my new Lubitel - thanks, Martin!
2. The lavender doggy sweater with grey skull and crossbones is guaranteed to turn out beautiful.
3. Part 1 of mystery knit-a-long will soon be underway for the big reveal.

What are you working on?

Wednesday, December 19, 2012

Pattern: Owl Wristees and Twisted Cowl

Well this post is over a week late. Not because I didn't have it ready, but because I just kept forgetting to post it!

The first snow has fallen here, and this pattern is just in time! Keep toasty with these owl wristees and twisted cowl.

Owl Wristees and Twisted Cowl
 

{Materials}
 
1 skein Knitpicks Biggo yarn
US 10 straight needles
US 11 straight needles
US 10 circular needles
Yarn needle
4 small buttons

{Dictionary}
 
CO - cast on
K - knit
P - purl
C4B - Slip 2 stitches onto cable needle and hold to back of work. Knit next 2 stitches then knit 2 stitches from cable needle.
C4F - Slip 2 stitches onto cable needle and hold to front of work. Knit next 2 stitches then knit 2 stitches from cable needle.
C2B - Slip 1 stitch onto cable needle and hold to back of work. Knit next stitch then knit 1 stitch from cable needle.
C2F - Slip 1 stitch onto cable needle and hold to front of work. Knit next stitch then knit 1 stitch from cable needle.

{Directions}

Owl Wristees
 
{Right Mitt}
 
CO 20 stitches
 
Row 1: (K2, P2) across
 
Rows 2 - 3: Knit across
 
Row 4: K2, P8, K10
 
Row 5: K10, C4B, C4F, K2
 
Rows 6, 8, 10, and 12: K2, P8, K10
 
Rows 7, 9, and 11: K across
 
Row 13: K10, C4B, C4F, K2
 
Rows 14, 16, and 18: K2, P8, K10
 
Rows 15 and 17: K across
 
Row 19: K10, C4B, C4F, K2
 
Row 20: K2, P2, K4, P2, K10
 
Row 21: K10, C2B, K4, C2F, K2
 
Rows 22 and 23: K across
 
BO using US11 needle
 
Seam edges together leaving hole for thumb

{Left Mitt}
CO 20 stitches
Rows 1: (K2, P2) across
 
Row 2 - 3: K across
 
Row 4: K10, P8, K2
 
Row 5: K2, C4B, C4F, K10
 
Rows 6, 8, 10, and 12: K10, P8, K2
 
Rows 7, 9, and 11: K across
 
Row 13: K2, C4B, C4F, K10
 
Rows 14, 16, and 18: K10, P8, K2
 
Rows 15 and 17: K across
 
Row 19: K2, C4B, C4F, K10
 
Row 20: K10, P2, K4, P2, K2
 
Row 21: K2, C2B, K4, C2F, K10
 
Rows 22 - 23: K across
 
BO using US 11 needle
 
Seam edges together leaving hold for thumb

Twisted Cowl
CO 40 stitches

Join in round leaving one twist in the stitches.

Work in P2, K2 ribbing until rest of skein is used.

BO.

Monday, December 3, 2012

Pattern: Wonder Woman Boot Toppers


Wonder Woman Boot Toppers

{Materials}
1-2 skeins Swish DK yarn in Canary
1 set US 6 dpns
1 pair US 6 straight needles
 
{Dictionary}
K - knit
P - purl
M1 - make 1 stitch knitwise
K2tog - knit 2 together
SSK - slip 2 stitches knitwise, then knit through back of stitches together
M1P - make 1 stitch purlwise
BO - bind off

{Pattern Notes}
If your boot fits close to your leg, follow directions for the outside section as follows. If your boot sets away from your leg, follow directions in [ ].

{Directions}

{Outside}
make 2

With US6 straight needles cast on 15 stitches.

{Straightaway}
Row 1: K across

Row 2: K1, P to last stitch, K1

Rows 3 - 18 [3 - 22]: follow rows 1 - 2.
 
{Slant Up}
Rows 19 and 23: K1, M1, K to last 2 stitches, K2tog

Rows 20, 22, and 24: K1, P to last stitch, K1

Rows 21 and 25: K across.

Rows 26, 28, 30, and 32: SSK, P to last stitch, M1P, K1

Rows 27 and 29: K across

Rows 31 and 33: K1, M1, K to last 2 stitches, K2tog

Row 34: K1, P to last stitch, K1
 
{Slant Down}
Rows 35, 37, 45, and 49: SSK, K to last stitch, M1, K1

Rows 36, 38, 40, and 42: P1, M1P, P to last 2 stitches, K2tog

Rows 39, 41, 43, and 47: K across

Rows 44, 46, 48, and 50: K1, P to last stitch, K1

{Straightaway}
Row 51: K across

Row 52: K1, P to last stitch, K1

Rows 53 - 66 [53 - 70]: follow rows 51 - 52.

BO. Seam ends together.


{Inside}
make 2

With US6 dpns. Cast on 52 stitches and join in round.

{Ribbing}
Working in P2, K2 ribbing, knit 20 rounds

Round 21: K25, BO27.

{Point}
Row 22: K across

Row 23 and every following odd row: P across

Row 24: (SSK, K1) x4, K1, (K1, K2tog) x4 [17 st]

Row 26: (SSK, K1) x2, K5, (K1, K2tog) x2 [13 st]

Row 28: (SSK, K1) x2, K1, (K1, K2tog) x2 [9 st]

Rows 30, 32, and 34: SSK, K to last 2 stitches, K2tog

Row 36: BO

Block all pieces and Seam together the tops of the outside and inside (being sure the purl sides are facing each other). 

Pair with your favorite boots, and revel in feeling a little bit super.

Monday, November 26, 2012

Pattern: Miniature Bunting

Thanksgiving weekend was a blast (I hope it was for you as well!). But now it's back to work and back to working on Christmas-y knits. I've finished off my Christmas list knitting, but now it's on to wrapping! I've vowed that next year, I will be much more creative with my Christmas packaging, but for this year, I'm only worrying about Syd's birthday extravaganza packaging.
So I knit up this adorable miniature b-day bunting to adorn the outside of her package (packaging post coming soon).
 
NOTE: Astrid over at Twisted Lamb was kind enough to convert this pattern into crochet!
 

Miniature Bunting

{Dictionary}
BO - bind off
CCF  - bring contrast color to front
K1M - knit 1 in main color
CCB - bring contrast color to back
K - knit
P - purl
SSK - slip 2 stitches knitwise, knit through back of stitches
K2tog - knit 2 together

{Materials}
US 6 needles
Any color worsted weight acrylic yarn

{Contrast Color}
CO 11

Row 1: K across

Row 2: BO 3 switching to main color on last BO. (CCF, K1M, CCB, K1M) x2. BO 3 with contract color.

{Main Color}
Row 3: K1, P3, K1.

Row 4: K across.

Rows 5 - 7: follow rows 3 - 4.

{Decrease}
Row 8: SSK. K1. K2tog.

Row 9: K1, P1, K1.

Row 10: slip first stitch knitwise, K2tog, then pass slipped stitch over knit stitch.


Weave in ends. Join the flags together, add embellishments and enjoy!


Monday, November 19, 2012

Pattern: Lady Tie

I made this adorable lady tie for Martin's sister. This was my first time embroidering, but I think it turned out alright. Plus the vintage shiny, yellow button was the perfect match for this yarn.


Lady Tie

{Dimensions}
Felted
End to End: 23"
Button to Buttonhole: 15.75"

{Materials}
2 skeins Wool of the Andes yarn in Opal Heather
Pair of US 9 straight needles

{Dictionary}
CO - cast on
K - knit
P - purl
P2tog - purl 2 together
K2tog - knit 2 together
YO - yarn over
M1P - make 1 purlwise
M1K - make 1 knitwise
BO - bind off

{Pattern Notes}
If you need more length around the neck, just add more rows in the Straightaway section.

{Directions}
Holding yarn doubled, CO 13 stitches.

{Decrease} 
Rows 1 - 5: (K1, P1) across

Row 6: P2tog, (K1, P1) to last 2 stitches, P2tog

Rows 7 - 10: (P1, K1) across

Row 11: K2tog, (P1, K1) to last 2 stitches, K2tog

Rows 12 - 16: (K1, P1) across

Row 17: P2tog, (K1, P1) to last 2 stitches, P2tog

{Buttonhole} 
Rows 18 - 25: (P1, K1) across

Row 26: P1, K1, P1, YO, P2tog, K1, P1

Rows 27 - 32: (P1, K1) across

{Increase} 
Row 33: K1, M1P, (K1, P1) to last stitch, M1P, K1

{Straightaway}
Rows 34 - 109: (K1, P1) across

{Decrease}
Row 110: P2tog, (K1, P1) to last 2 stitches, P2tog

Rows 111 - 125: (P1, K1) across

Row 126: K1, M1P, (K1, P1) to last stitch, M1P, K1

Rows 127 - 131: (K1, P1) across

{Increase} 
Row 132: P1, M1K, (P1, K1) to last stitch, M1K, P1

Rows 133 - 136: (P1, K1) across

Row 137: K1, M1P, (K1, P1) to last stitch, M1P, K1

Rows 138 - 141: (K1, P1) across

BO all stitches.

{Finishing}
Weave in and tie off ends.

Felt piece.

Add button. [ I had to cut a slightly larger hole for the button. I was able to pinpoint the location of the cut by finding the tiny hole that remained from the YO at the beginning of the pattern. ]

Add embellishments and enjoy!

Mushroom embroidery.

Sunday, November 18, 2012

Photo Tutorial: Felting

Here's the promised felting tutorial. This tutorial covers felting in an upright washing machine only. For other felting techniques, check out this site.


Start with your finished knitted piece. Tie off loose ends. I personally don't bother weaving them in, because once felted, I can just cut off the loose tail without worries of unraveling.


Throw your knitted piece into the washer with a couple pairs of jeans. Note: Do not use towels! They will lint all over the place.


Set your washer to the smallest water level, hot wash / cold rinse temperature setting, and heavy duty cycle.


Add just a tiny bit of soap to the load.


Check back every ten minutes, restarting the load every time so it doesn't switch to the cold cycle. Once all your stitches have lost definition and felted together, allow the washer to finish through the cold rinse. Set your piece out flat to dry completely.

Add your embellishments and enjoy!


Monday, November 12, 2012

Pattern: Wonder Woman Slippers

I love, love, love this pattern! But of course I would seeing how my love of Wonder Woman will never fade.

This pattern is for the knit pattern only - felting tutorial post coming soon!


Wonder Woman Slippers

{Sizes}
Small US 5-6 (Medium US 7-8) (Large US 9-10)

{Materials}
2 skeins Wool of the Andes worsted yarn in Red
2 skeins Wool of the Andes worsted yarn in Caution
1 pair of US 11 needles

{Dictionary}
CO - cast on

{Pattern notes}
For the decrease of 3 stitches on each side at the top of the charts, bind off 3 stitches on odd row [row 25 (29) (33)], then bind off 3 stitches on the next even row (should have total of 26 (30) (34) rows after bind off rows).

So that slippers are mirror images of each other, I work one slipper starting on the right side and the other slipper starting on the wrong side.

{Directions}

CO 32 stitches in red.

{Double Knitting}
Follow the proper size chart below

{Small}


{Medium}


{Large}


{Decreases / Increases}

Work your decreases and increases using the chart below. Watch the video tutorial here if you don't know how to decrease / increase your stitches with double knitting.


{Finishing}
Weave in ends, felt down these babies, and enjoy!

A felting tutorial post will be up Saturday, so check back soon. Also, it will be a picture tutorial seeing as I was extremely awkward in the video tutorial. Haha.

Saturday, November 10, 2012

Video Tutorial: How to Increase and Decrease with Double Knitting

Here's how to do increases and decreases with double knitting. This tutorial specifically applies to my Aquaman and Wonder Woman slippers patterns.


This is my very first video I've ever done, and I'm exceptionally awkward. I felt like Ricky Bobby in front of the camera -  I just didn't know what to do with my hands. Haha.

If you have any questions, please comment below or email me: daysofowls (at) hotmail (dot) com.

Thursday, November 8, 2012

Knitting Frenzy: 6

Almost all of my Christmas gifts are done now. Hoowee!

1. Martin
2. Marsha
3. Sydney
4. Secret Santa
5. Kia
6. Terry

Marsha's snowman ornament
I finished Marsha's snowman ornament, and his little bead eyes are still making me squee. I'm glad to be done with ornament making. As cute as they are, I was really ready to move on to knitting things I could get really excited about.

Kia's lady tie
Speaking of exciting things, I finished knitting two swatches for Kia's lady tie (and two prototypes). I've decided on moss stitch with yarn held doubled so it would have a little weight to it and lay flat easily. I also worked my butt off getting the math just right (I really flub it up sometimes). I can't wait to add the embroidery to the final piece. Who'd have thought I'd be so excited to hand sew something? And working the final piece out should help make a great tutorial for felting!

Wonder Woman slippers
Right now I'm working on the small side project of my Wonder Woman slippers. A video tutorial post on how to increase and decrease stitches with double knitting should be up Saturday, and the pattern post for these babies will be up Monday. I'm going to felt them down with Syd's Aquaman slippers whenever she comes over to get her birthday present.

Kitten
And I'll be casting on for Terry's wonderful Christmas houses soon. I've got a plan of action, but I'm going to run through a trial house first. Also, my Kitten is cute and matches my carpet.

Monday, November 5, 2012

Pattern: Comic Book Cozy

This cozy can also be used for an iPad or tablet. Sydney doesn't have either, but she does have a scheduled weekly shopping trip to our favorite comic shop in town.

This pattern was adapted from this cabled iPad sleeve by Sarah Davis. I followed her pattern up until the end where I cast off one complete side and start knitting back and forth for the handle / flap.


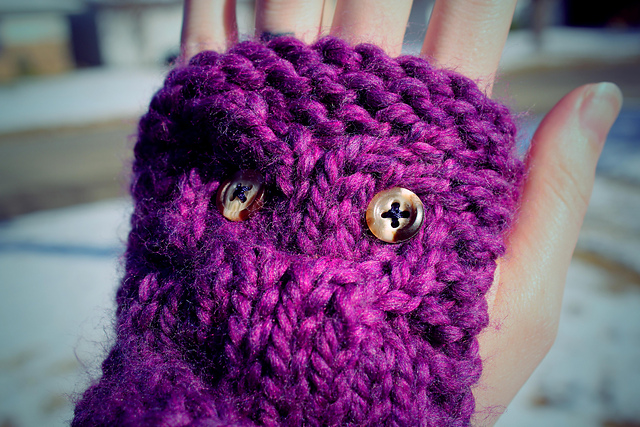
Cabled Tablet / Comic Book Cozy

{Materials}
1 skein worsted weight acrylic yarn
US 8 16" circular needles
US 8 straight needles (optional)
Stitch markers
Button
Cable needle


{Dictionary}
[ ] - pattern notes
BO - bind off
C8B - slip 4 stitches onto your cable needle held to back of work. Knit next 4 on your working needle, then knit the 4 on your cable needle.
C8F - slip 4 stitches onto your cable needle held to front of work. Knit next 4 on your working needle, then knit the 4 on your cable needle.
CO - cast on
K - knit
K2tog - knit 2 together
KtoE - knit to end
KtoM - knit to marker
P - purl
PM - place marker
PtoE - purl to end
PtoM - purl to marker
SSK - slip the next 2 stitches knitwise, then knit through back of 2 stitches together


{Directions}
Holding yarn doubled (I used the center pull strand and the strand from the outside of the skein), cast on 72 stitches.

Rounds 1 - 2: K all

{Cable Pattern}
Rounds 3 - 6: (K8, P2, K16, P2, K8) repeat

Round 7: (K8, P2, C8B, C8B, P2, K8) repeat

Rounds 8 - 12: (K8, P2, K16, P2, K8) repeat

Round 13: (K8, P2, K4, C8F, K4, P2, K8) repeat

Rounds 14 - 46: follow rounds 3 - 13

{Handle}
This is where you can switch to straight needles if you wish (or you can keep knitting back and forth on your circs).

Row 47: K8, BO20, K8, BO36

Row 48: K8, CO20, K8 [36 stitches total]

Row 49: P8, K2, P16, K2, P8

Row 50: K8, P2, K16, P2, K8

Rows 51 - 52: follow rounds 49 - 50

Row 53: P8, BO20, P8

{Flap}
Row 54: K8, PM, CO20, PM, K8 [36 stitches total]

Rows 55 and 57: PtoM, K2, P16, K2, PtoE

Row 56: KtoM, P2, K16, P2, KtoE

Rows 58 and 70: SSK, KtoM, P2, C8B, C8B, P2, K until 2 stitches remain, K2tog

Rows 59, 61, 63, 65, 67, 69, and 71: PtoM, K2, P16, K2, PtoE

Rows 60, 62, 66, and 68: SSK, KtoM, P2, K16, P2, K until last 2 stitches, K2tog

Row 64: SSK, KtoM, P2, K4, C8F, K4, P2, K until 2 stitches remain, K2tog

Remove markers as you get to them.
Row 72: SSK, K8, BO2, K8, K2tog

Row 73: P9, CO2, P9 [20 stitches total]

Row 74: SSK, K until last 2 stitches, K2tog

Row 75: P across

Rows 76 - 79: follow rows 74 - 75 [14 stitches should remain at end]

Bind off, weave in ends, seam up bottom, block, and sew on a button.

Note: I blocked my piece before seaming up the bottom to make it easier for me to align the bottom correctly.


Friday, November 2, 2012

Knitting Frenzy: 5

Palette Yarn :: knitpicks
The yarn for the tiny houses came in yesterday, and I'm rushing to get all my other gifts knitted up so I can start working with this amazing yarn!

1. Martin
2. Marsha
3. Sydney
4. Secret Santa
5. Kia
6. Terry


pattern :: Amy Gaines
I'm officially finished with the set of adorable ornaments I started a couple weeks ago for my Secret Santa at work. I'm going gaga for the little snowman eyes!


pattern :: coming soon
I will be finishing up Syd's comic book cozy tonight. I've knit it all up, woven in ends, and blocked it last night to make it easier to seam it up evenly. Then it's just a cute little button to hold the flap down and I'll be done!


pattern :: Amy Gaines
I started on Marsha's ornament Wednesday night. My wrist is starting to hurt again... dang. I think it's from how tense I get when I'm working with tiny needles. I have to stop myself often just to take a breath and force myself to relax my muscles... it's very counterintuitive.

Monday, October 29, 2012

Pattern: Aquaman Slippers

This is definitely one of my favorite things I've ever made, and I'm so excited to share it!

This post covers the knit design only and not the felting. Don't worry, though; I'll post in a couple of weeks on felting your projects.

This pattern was adapted from these adorable bunny slippers by tiny owl knits.

size shown :: large

Aquaman Slippers

{Sizes}
Small US 5-6 (Medium US 7-8) (Large US 9-10)

{Materials}
2 skeins Wool of the Andes Worsted Yarn in Grass
1 skein Wool of the Andes Worsted Yarn in Caution
1 skein of Wool of the Andes Worsted Yarn in Orange
1 pair of US 11 needles

{Dictionary}
[ ] - pattern note
K - knit
K2tog - knit 2 together
KB - knit through back
KF - knit through front
KFB - knit through front and back
M1 - make 1 stitch: To do this, swing your working needle down to pick up the ladder between stitches (I picked up the color of the stitch below the next stitch on my working needle). Then either knit or purl through the stitch you've made with the color indicated.
O - orange
P - purl
P2tog - purl 2 together
PB - purl through back
SK - slip knitwise
SP - slip purlwise
WN - working needle
Y - yellow

{Directions}

Holding yarn doubled, cast on 28 stitches in Grass.

Knit three rows.

Row 4: P9, K10, P9

Row 5: K across

Repeat rows 4 and 5 until work is a total of 26 (30) (34) rows. Cut your tail for the green (about 6 inches).

The rest of the pattern will be worked using double knitting, following the chart below.

This chart shows the right side of the work. When working 
the wrong side, reverse colors.
Working the increases and decreases can be tricky when double knitting so I'll try to make a little video tutorial next week when I work on my Wonder Woman slippers. Until then, I've tried wording it the best I know how below using the pattern dictionary above. But if anyone has any questions at all, just ask!

{Double Knitting}
Row 1: KF of first 2 stitches with O, then KB of both with the Y. KFB of each stitch, alternating colors until 2 stitches remain. KF of both stitches with O, then KB of both with Y.

Row 2: (KY, PO) across.

Row 3: SK the O stitch, then SK the next Y and O stitches together [this will flip the orange and yellow stitches]. SK the Y back to your WN [your right needle should only house two orange stitches]. KB of first two O stitches together with O. P2tog first two Y stitches with Y. (KO, PY) until four stitches remain [2 yellow and 2 orange]. SK the first O stitch, then SK the next Y and O stitches together [this will flip the orange and yellow stitches]. SK the last Y stitch. SP both Y stitches back to your WN, then SK both O stitches back to your WN. K2tog both O stitches with O. PB of both Y stitches together with Y.

Row 4: (KY, PO) across.

Repeat rows 3 and 4 until row 10.

Row 10: (KO, PY) across.

Row 11: SK the Y stitch, then SK the next O and Y stitches together. SK the O back to your WN. KB of first two Y stitches together with Y. P2tog first two O stitches with O. (KY, PO) until four stitches remain [2 yellow and 2 orange]. SK the first Y stitch, then SK the next O and Y stitches together. SK the last O stitch. SP both O stitches back to your WN, then SK both Y stitches back to your WN. K2tog both Y stitches with Y. PB of both O stitches together with O.

Row 12: (KY, PO) across.

Row 13: SK the O stitch, then SK the next Y and O stitches together. SK the Y back to your WN. KB of first two O stitches together with Y. P2tog first two Y stitches with O. (KY, PO) until four stitches remain [2 yellow and 2 orange]. SK the first O stitch, then SK the next Y and O stitches together. SK the last Y stitch. SP both Y stitches back to your WN, then SK both O stitches back to your WN. K2tog both O stitches with Y. PB of both Y stitches together with O.

Row 14: (KO, PY) across.

Row 15: SK the Y stitch, then SK the next O and Y stitches together. SK the O back to your WN. KB of first two Y stitches together with O. P2tog first two O stitches with Y. (KO, PY) until four stitches remain [2 yellow and 2 orange]. SK the first Y stitch, then SK the next O and Y stitches together. SK the last O stitch. SP both O stitches back to your WN, then SK both Y stitches back to your WN. K2tog both Y stitches with O. PB of both O stitches together with Y.

Row 16: (KY, PO) across.

Rows 17 - 24: Follow rows 3 and 4.

Row 25: KO, PY, M1O, M1Y, (KO, PY) until last stitch. M1O, M1Y, KO, PY.

Row 26: (KY, PO) across.

Repeat rows 25 - 26 once.

Row 29: KY, PO, M1O, M1Y, (KO, PY) until last two stitches [1 orange, 1 yellow]. M1O, M1Y, KY, PO.

Row 30: KO, PY. (KY, PO) until last two stitches [1 orange, 1 yellow]. KO, PY.

Row 31: KY, PO. M1Y, M1O. (KO, PY) until last two stitches [1 orange, 1 yellow]. M1Y, M1O. KY, PO.

Row 32: KY, PO. KO, PY. (KY, PO) until last four stitches [2 orange, 2 yellow]. KO, PY. KY, PO.

Row 33: KY, PO. M1Y, M1O. (KY,PO) x2. (KO, PY) until last six stitches [3 orange, 3 yellow]. (KY, PO) x2. M1Y, M1O. KY, PO.

Row 34: (KO, PY) x4. (KY, PO) until last eight stitches [4 orange, 4 yellow]. (KO, PY) x4.

Row 35: SK the Y stitch, then SK the next O and Y stitches together. SK the O back to your WN. KB of first two Y stitches together with O. P2tog first two O stitches with Y. KO, PY. (KY, PO) x2. (KO, PY) x4. (KY, PO) x2. KO, PY. SK the first Y stitch, then SK the next O and Y stitches together. SK the last O stitch. SP both O stitches back to your WN, then SK both Y stitches back to your WN. K2tog both Y stitches with O. PB of both O stitches together with Y.

Row 36: (KO, PY) across.

Row 37: SK the Y stitch, then SK the next O and Y stitches together. SK the O back to your WN. KB of first two Y stitches together with Y. P2tog first two O stitches with O. (KY, PO) until last two stitches. SK the first Y stitch, then SK the next O and Y stitches together. SK the last O stitch. SP both O stitches back to your WN, then SK both Y stitches back to your WN. K2tog both Y stitches with Y. PB of both O stitches together with O.

Row 38: (KY, PO) x2. (KO, PY) x2, (KY, PO) x2. (KO, PY) x2. (KY, PO) x2.

Row 39: SK the O stitch, then SK the next Y and O stitches together. SK the Y back to your WN. KB of first two O stitches together with O. P2tog first two Y stitches with Y. KO, PY. (KY, PO) x4. KO, PY. SK the first O stitch, then SK the next Y and O stitches together. SK the last Y stitch. SP both Y stitches back to your WN, then SK both O stitches back to your WN. K2tog both O stitches with O. PB of both Y stitches together with Y.

Row 40: (KY, PO) x3. (KO, PY) x2. (KY, PO) x3.

Row 41: SK the O stitch, then SK the next Y and O stitches together. SK the Y back to your WN. KB of first two O stitches together with O. P2tog first two Y stitches with Y. (KO, PY) until last two stitches. SK the first O stitch, then SK the next Y and O stitches together. SK the last Y stitch. SP both Y stitches back to your WN, then SK both O stitches back to your WN. K2tog both O stitches with O. PB of both Y stitches together with Y.

Row 42: (KY, PO) across.

Repeat rows 41 - 42 once.

Bind off.

Weave in all ends and seam up the toe.

Now it's felting time (post coming soon).

Monday, October 22, 2012

Knitting Frenzy: 4

I was finally able to pick up my knitting needles this weekend. Yay! I decided to work on something for me that would be a super quick knit so I didn't have to worry about stressing my wrist on the tiny needles I'm having to use for the ornaments. I got this super cute cowl knitted up all in one night. I haven't gotten to wear it yet, but once the next cold front hits, I'll be ready!

I've come a very long way on my Christmas gift knitting, and by my calculations, I should be finished by the end of November. Perfect! I did cheat by buying Martin's gift online. When I found it, I just couldn't stop myself. I still have some prep work to do for it, but that will wait until I'm home alone. And don't worry, lots of pictures when I get it ready.

1. Martin
2. Marsha
3. Sydney
4. Secret Santa
5. Kia

I got word from my parents that they won't be doing a big family Christmas again this year, so I won't have to worry about making any gifts for anyone in my own family.

I've finished knitting up Sydney's Aquaman slippers (birthday present), but I can't felt them down without her there, so her birthday gift is as done as it can be until her birthday arrives. Though I do need to start thinking about packaging.


I'm currently working on my Secret Santa's ornaments. I had every person participating pick out the four ornaments they wanted before we drew names. So I'm knitting up a snowman, peppermint candy, cupcake, and birdhouse out of this pattern set I bought a while back. Then I'll go ahead and finish off the second snowman for Martin's mom.